How to program your first show with Airtime
After you sign up for your free trial you’ll receive an email letting you know that your Airtime station is ready. Once you receive that, you can log in at your chosen domain address (ie. amazingradio.airtime.pro).

Once you are logged in, you can begin programming radio content and managing your DJs. This guide walks you through the navigation of that process. However, if you have any questions or concerns you can always ask our support team for a little help either in the live chat window located in the bottom corner of Airtime or emailing us at help@sourcefabric.org
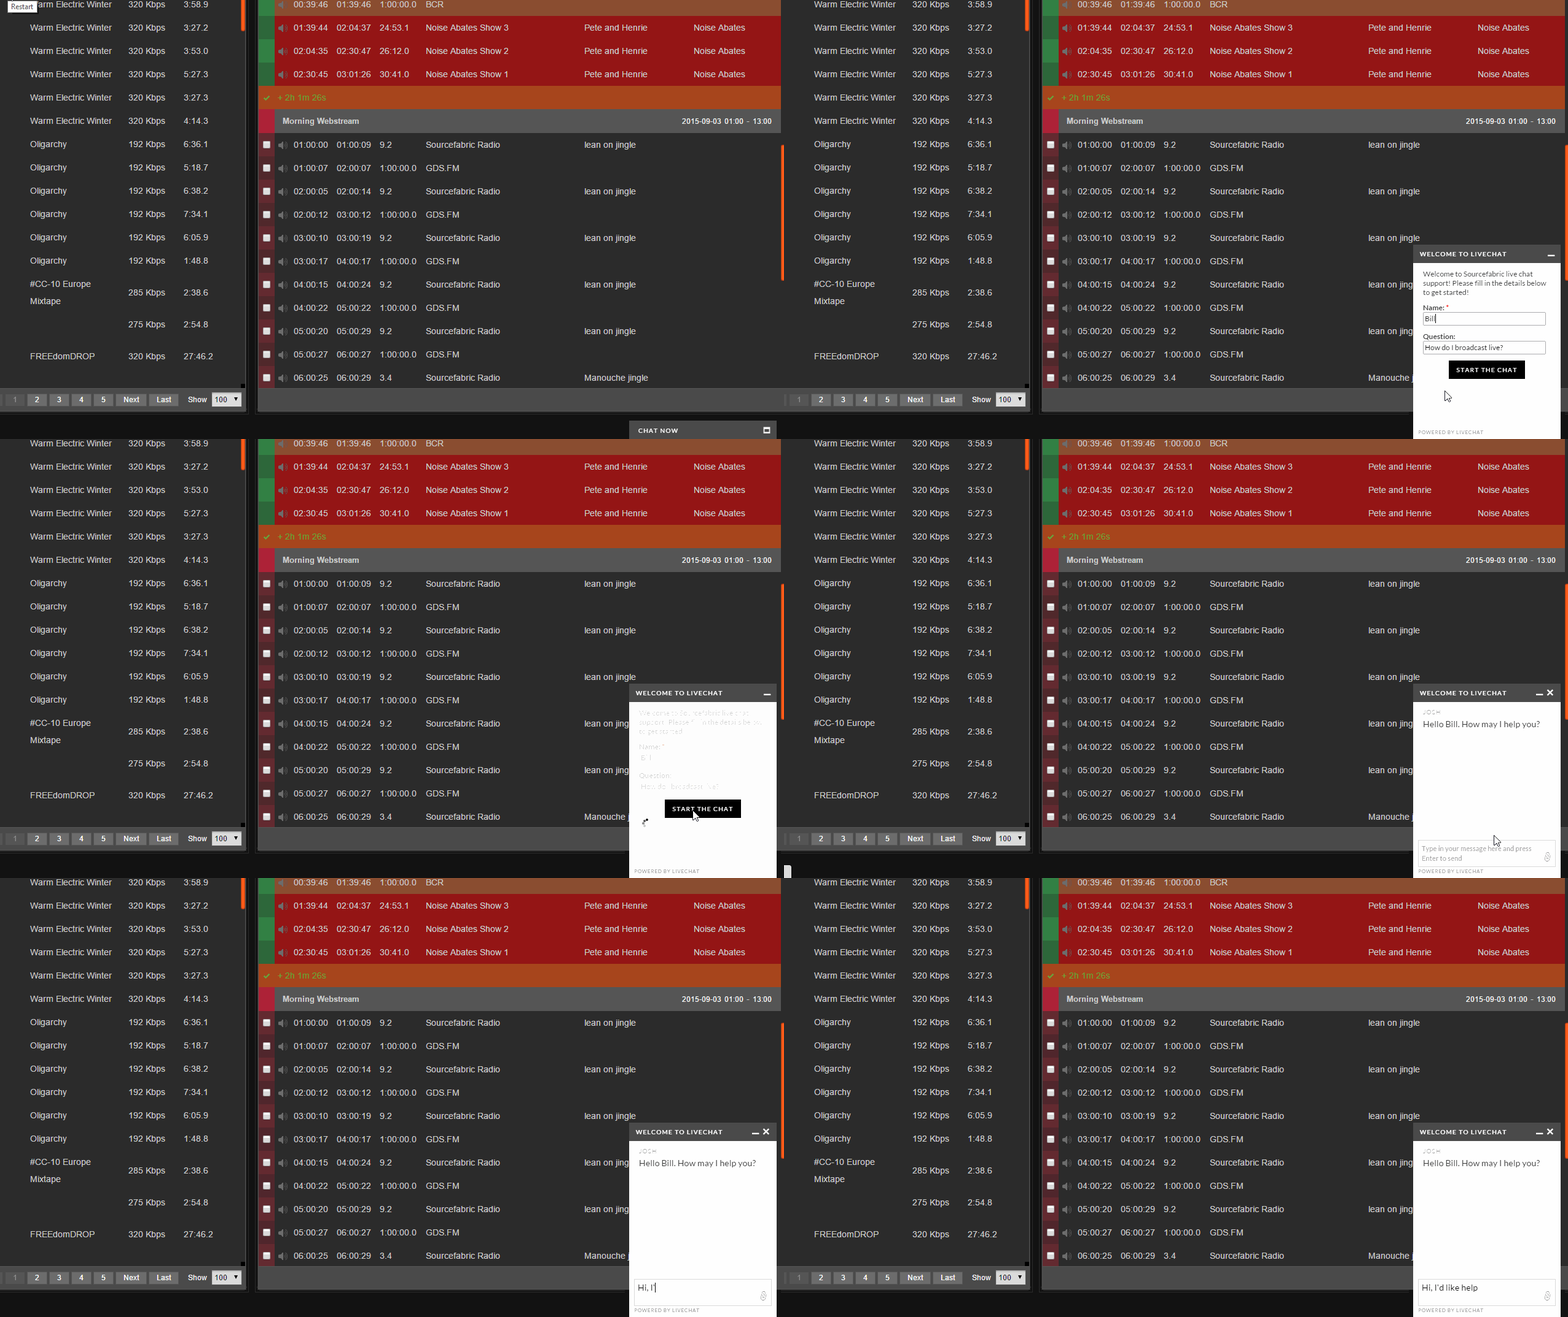
1. Set up your station and user
You’ll need to set the station time zone from the Settings menu before you start programming your content. This is the time zone that will be default for your station and new DJs, it will also be what your schedule will show on your radio page. Click on Settings and scroll down until you see the Station Timezone setting.
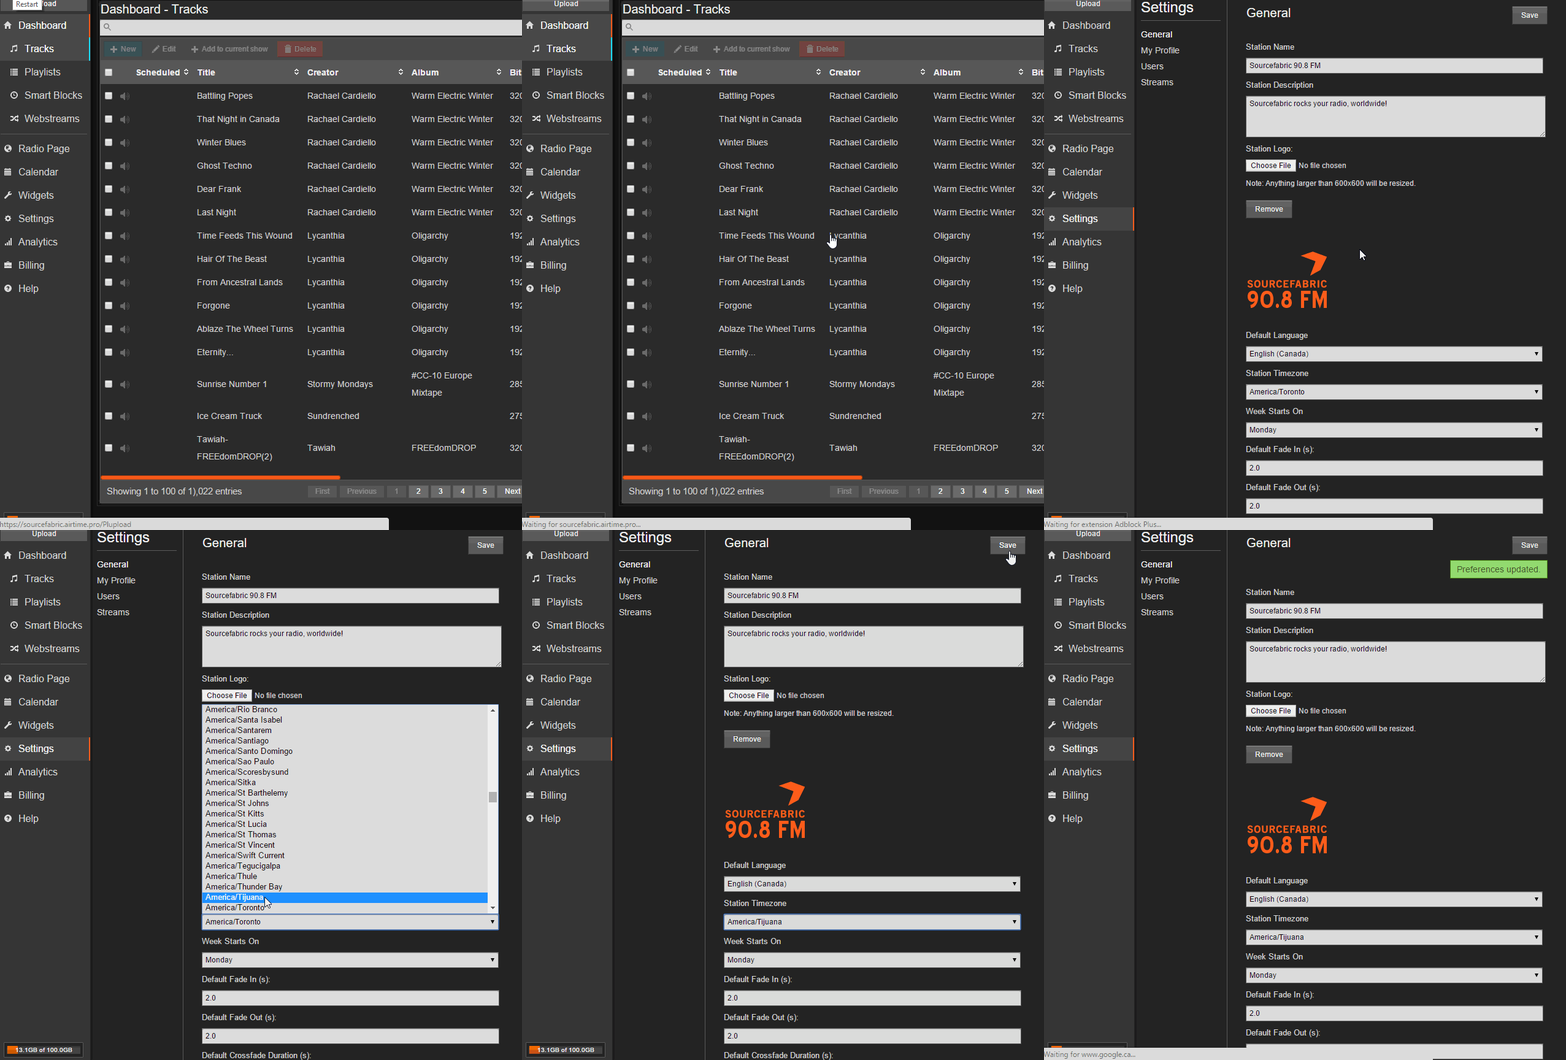
2. Set up the interface (user) timezone
Any user, either admin or DJ, will want to set up a few details about themselves. An important setting is your timezone. Even if your station is set to a different timezone, users can program their content and view the calendar in their local timezone.
Start by clicking on Settings, then click My Profile. You’ll see Interface Timezone as the last dropdown menu. Select the timezone you’d prefer and click Save.
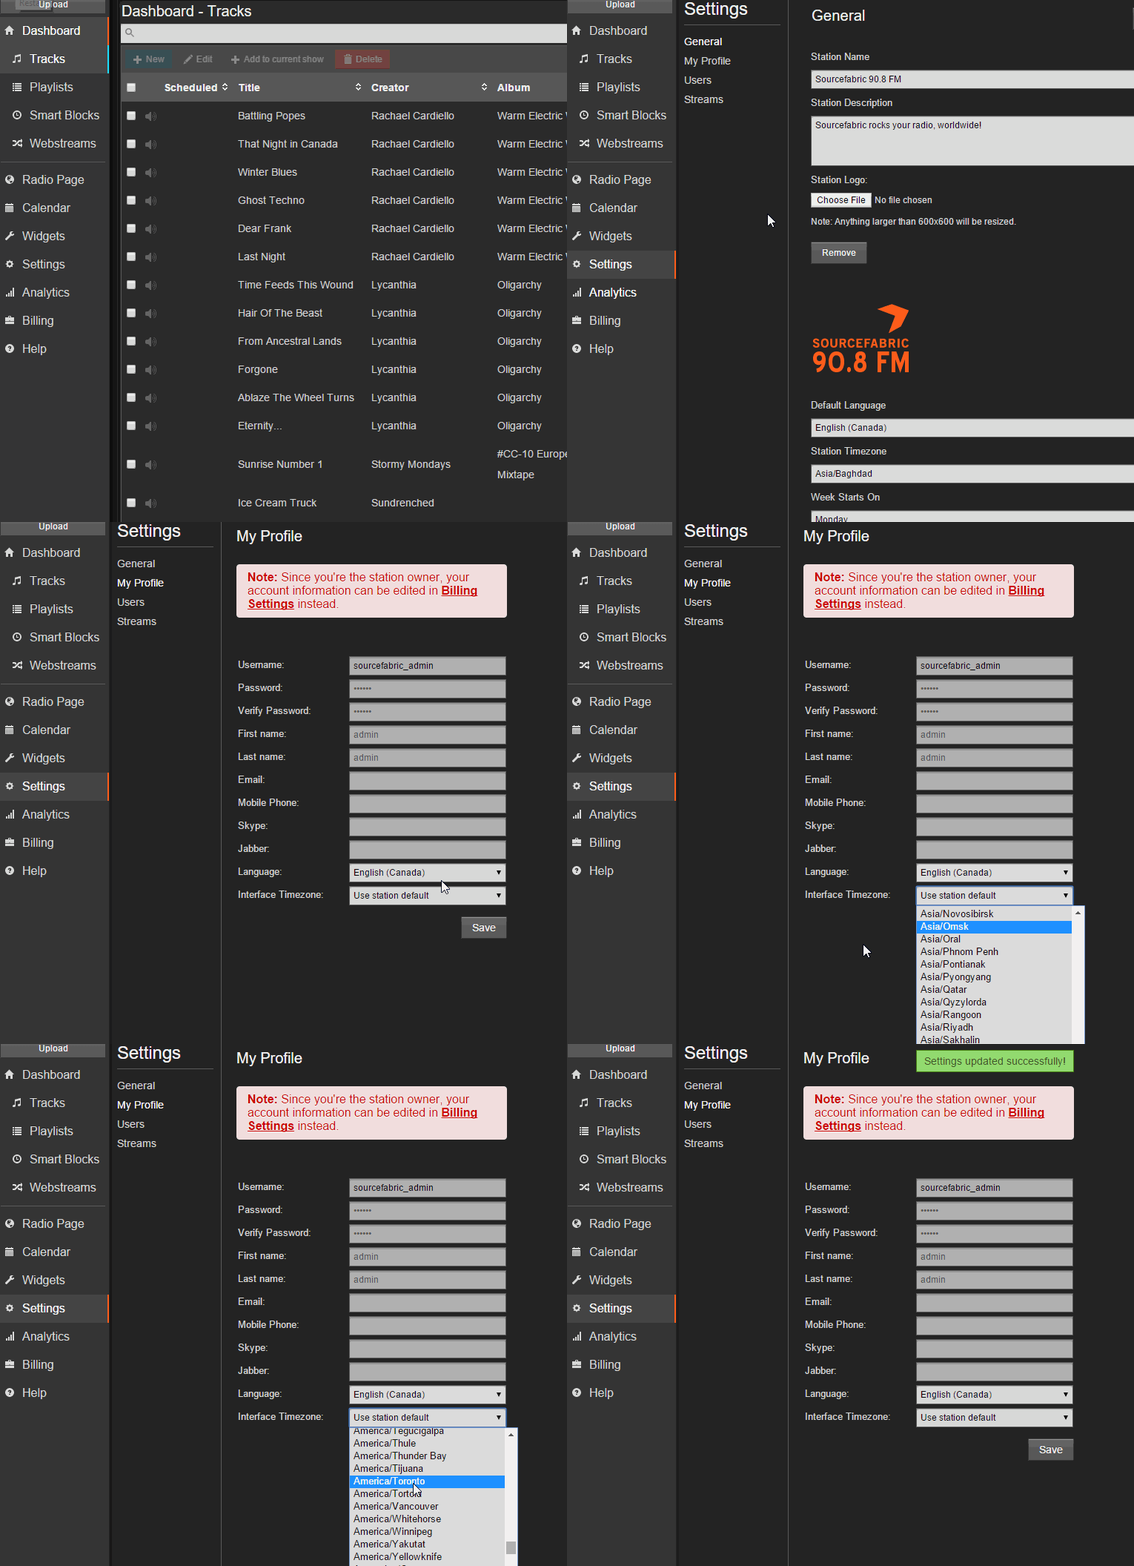
3. Upload your media
Click the Upload button on the left side of Airtime Pro. You can either click on the upload area, or drag and drop the files as shown below.
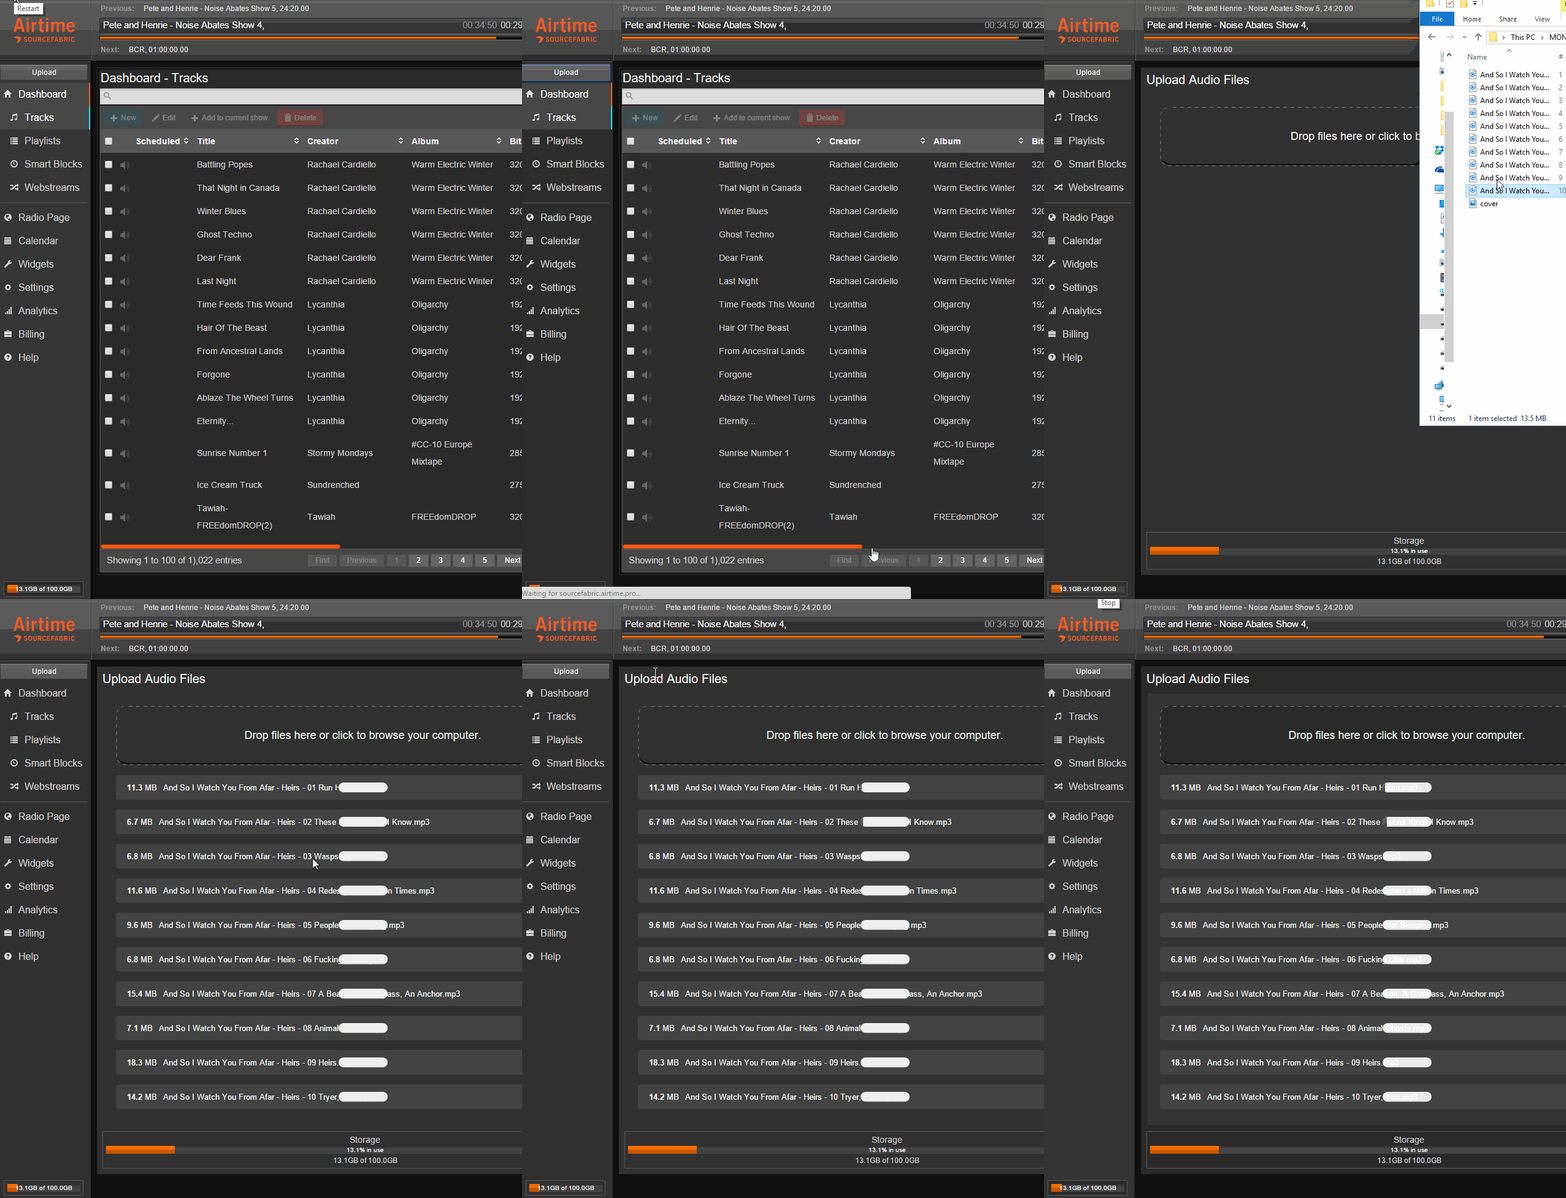
Another option for uploading media is via FTP. You can get your login details and help from our support team by chatting with our team in live chat or filing a ticket through the Help menu.
4. Schedule your first show
Now that you have media in Airtime you can begin to schedule your first show. Click Calendar in the navigation bar on the left. Use the weekly view, since there isn’t anything in the calendar. As you schedule more content, the daily and monthly schedules will be more useful.
On the calendar page, click the day you want to schedule your show. This will open a window on the left side of your screen with a series of details about your show. Name the show and select a time for it to be scheduled. After you are finished filling in all the details, click “Add this show”.
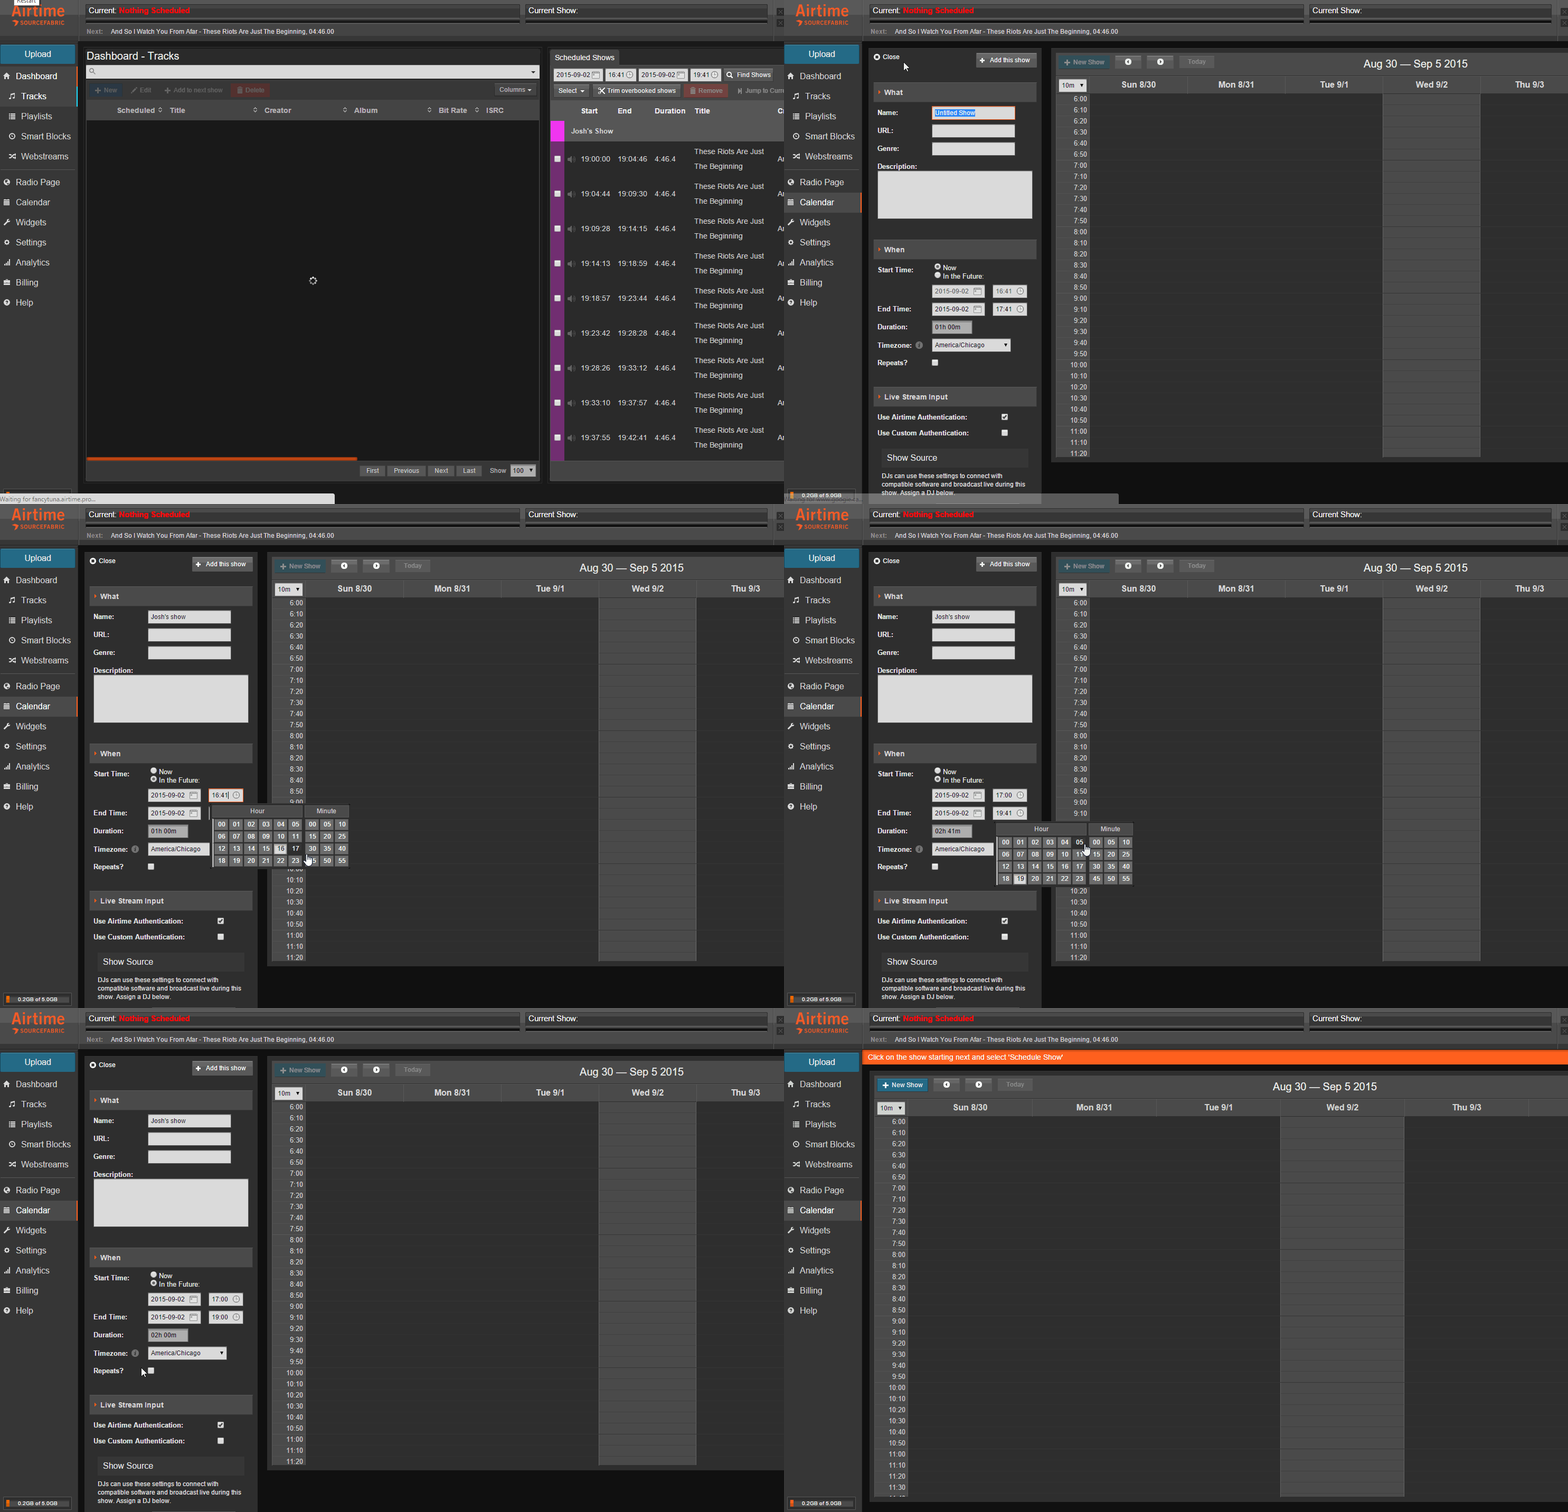
This is a very basic way to schedule a show and the scheduler can do much more complex things. See our manual for tips on show scheduling and how to use the calendar.
5. Create your first playlist
Creating playlists in Airtime is valuable because you have the option to reuse the same structure for multiple shows. Once you create,
First click Playlist on the right side navigation menu. You’ll now have a new playlist on the right side of the screen. You can rename the playlist and write a description for it as well. Once you have the playlist named, you can drag and drop media from your dashboard on the left into the playlist on the right.
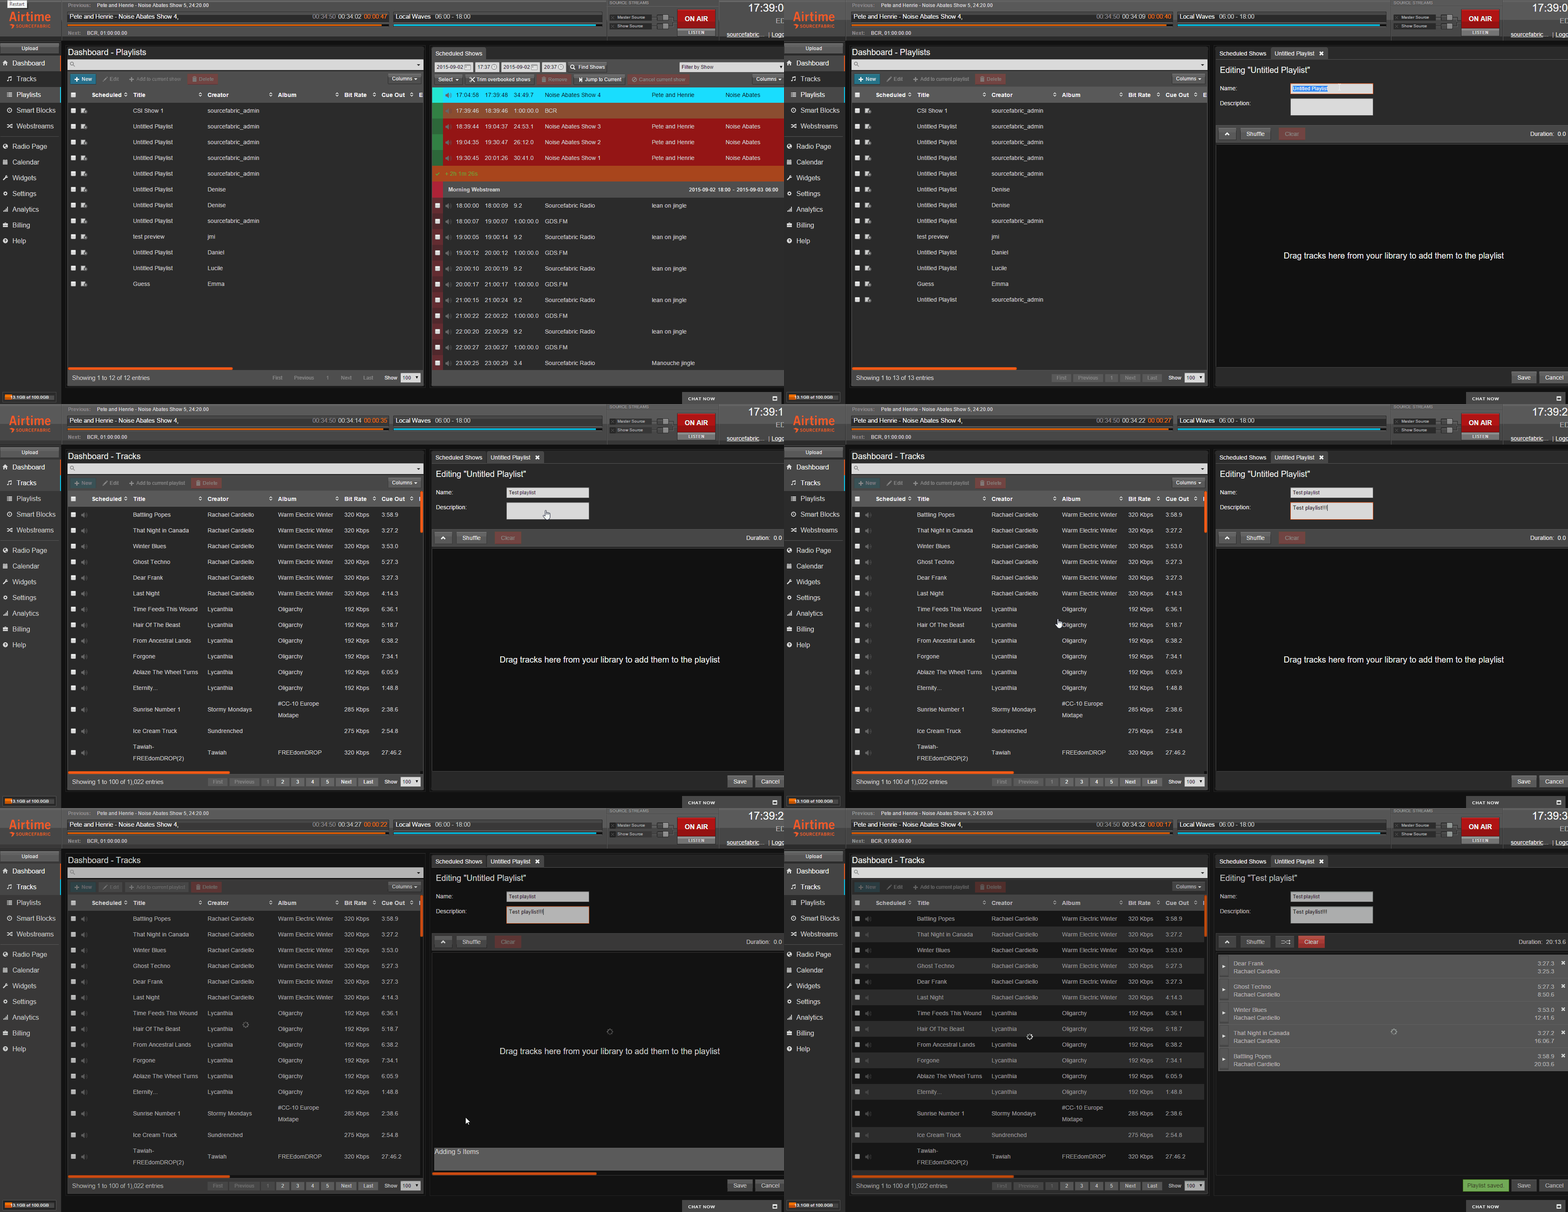
When you’re happy with your playlist, click Save.
You can now schedule this playlist for any show and continue to reuse it or modify it in the future.
For a more in depth look at playlists and scheduling Smart Blocks and Webstreams, refer to the manual.
6. Adding content to your show
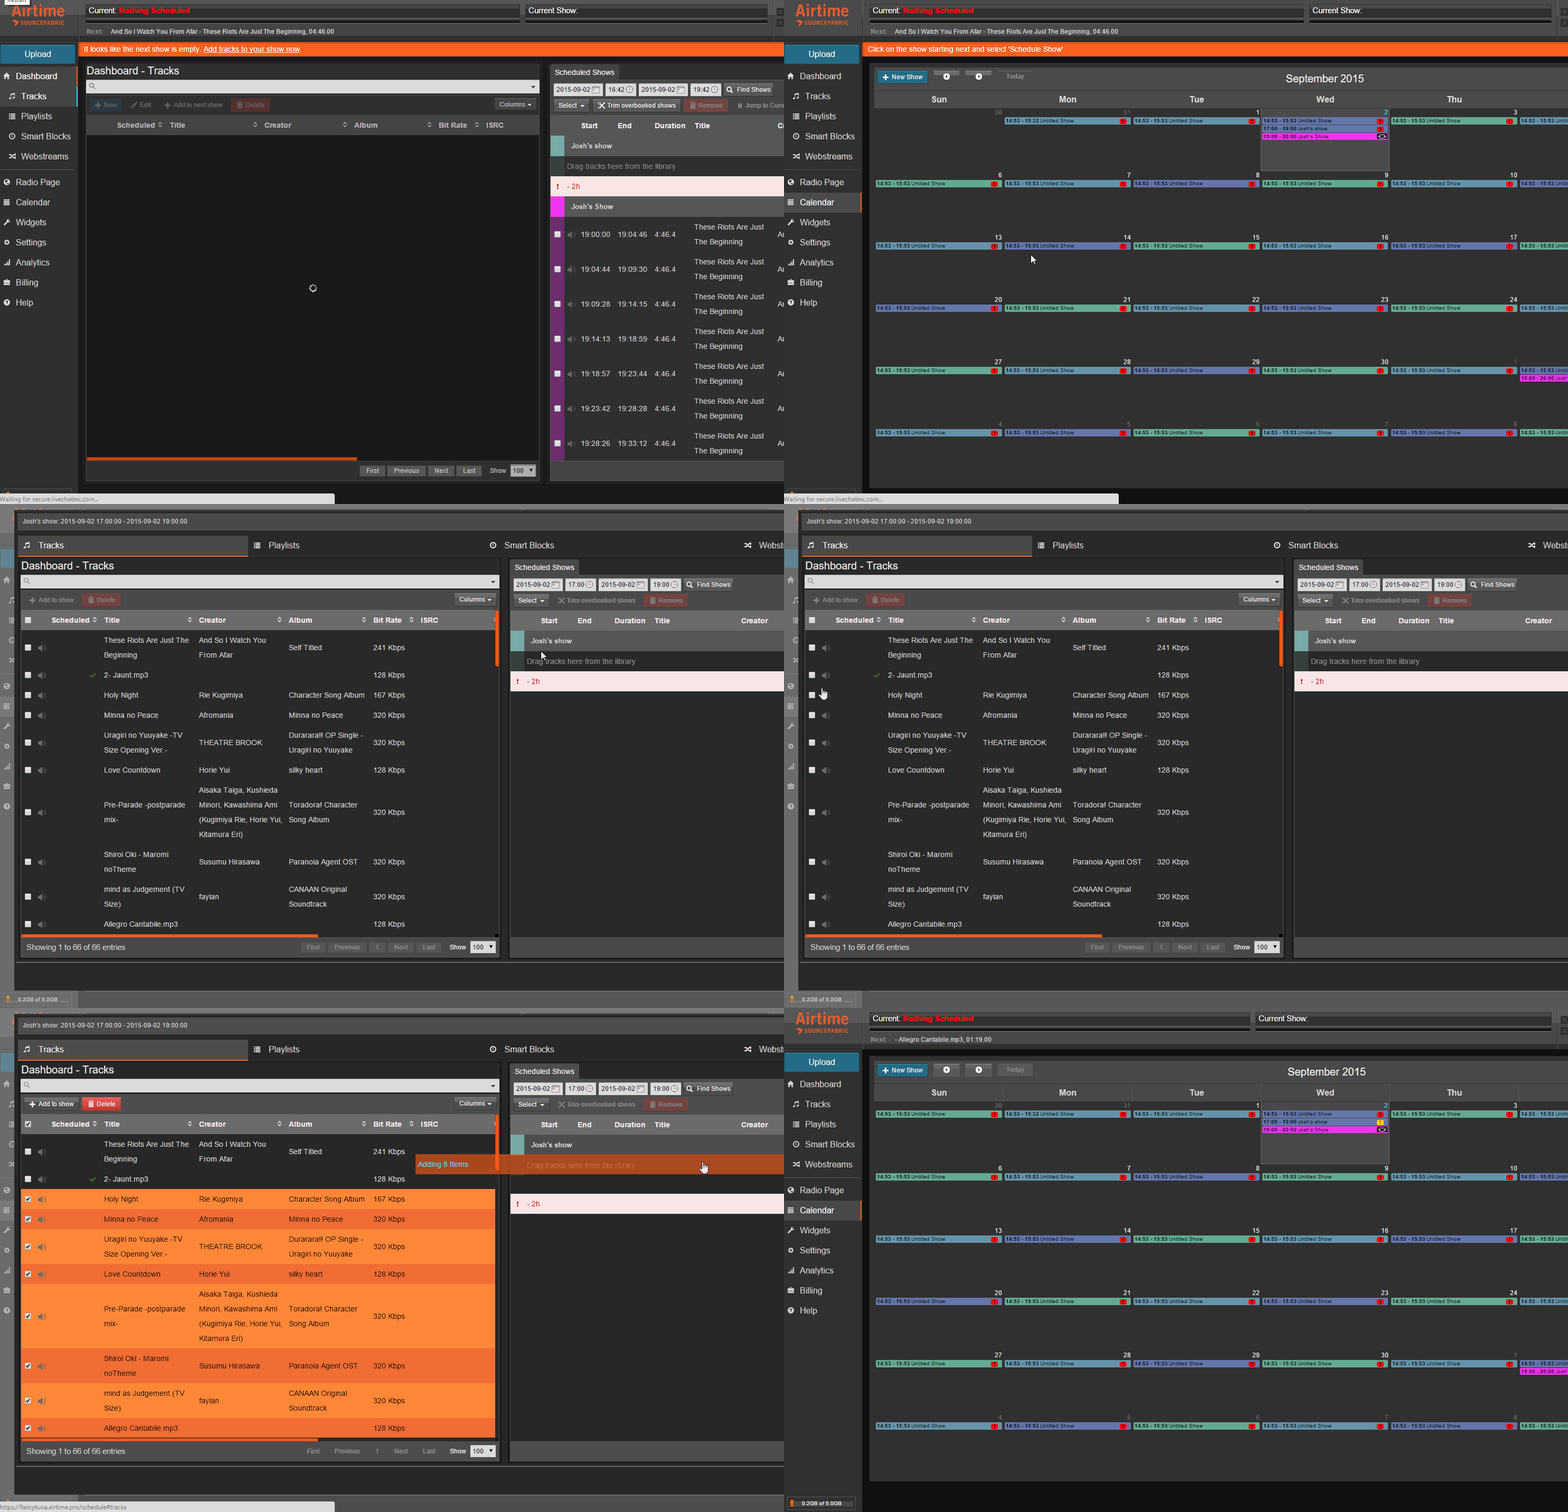
To add content to the show you’ve created, click Calendar at the top, you should see your show at the scheduled time. When you click on your show, a series of options will appear. Click Add/Remove Content. This will open a list of scheduled tracks (if you’ve programmed them) on the right side of your screen and your library of content on the left. Find the playlist we made earlier by searching or scrolling through the library and drag it to the right side into your playlist, you can also highlight and drag individual tracks as seen below. You’ve now scheduled your first show!
7. Adding another DJ
If you’re planning to work with other contributors, you’ll need to add them as a DJ or a Program Manager. A DJ can upload content but can only add content to their assigned shows. A Program Manager can create/delete/edit shows and assign DJs to them but won’t have access to the System menu.
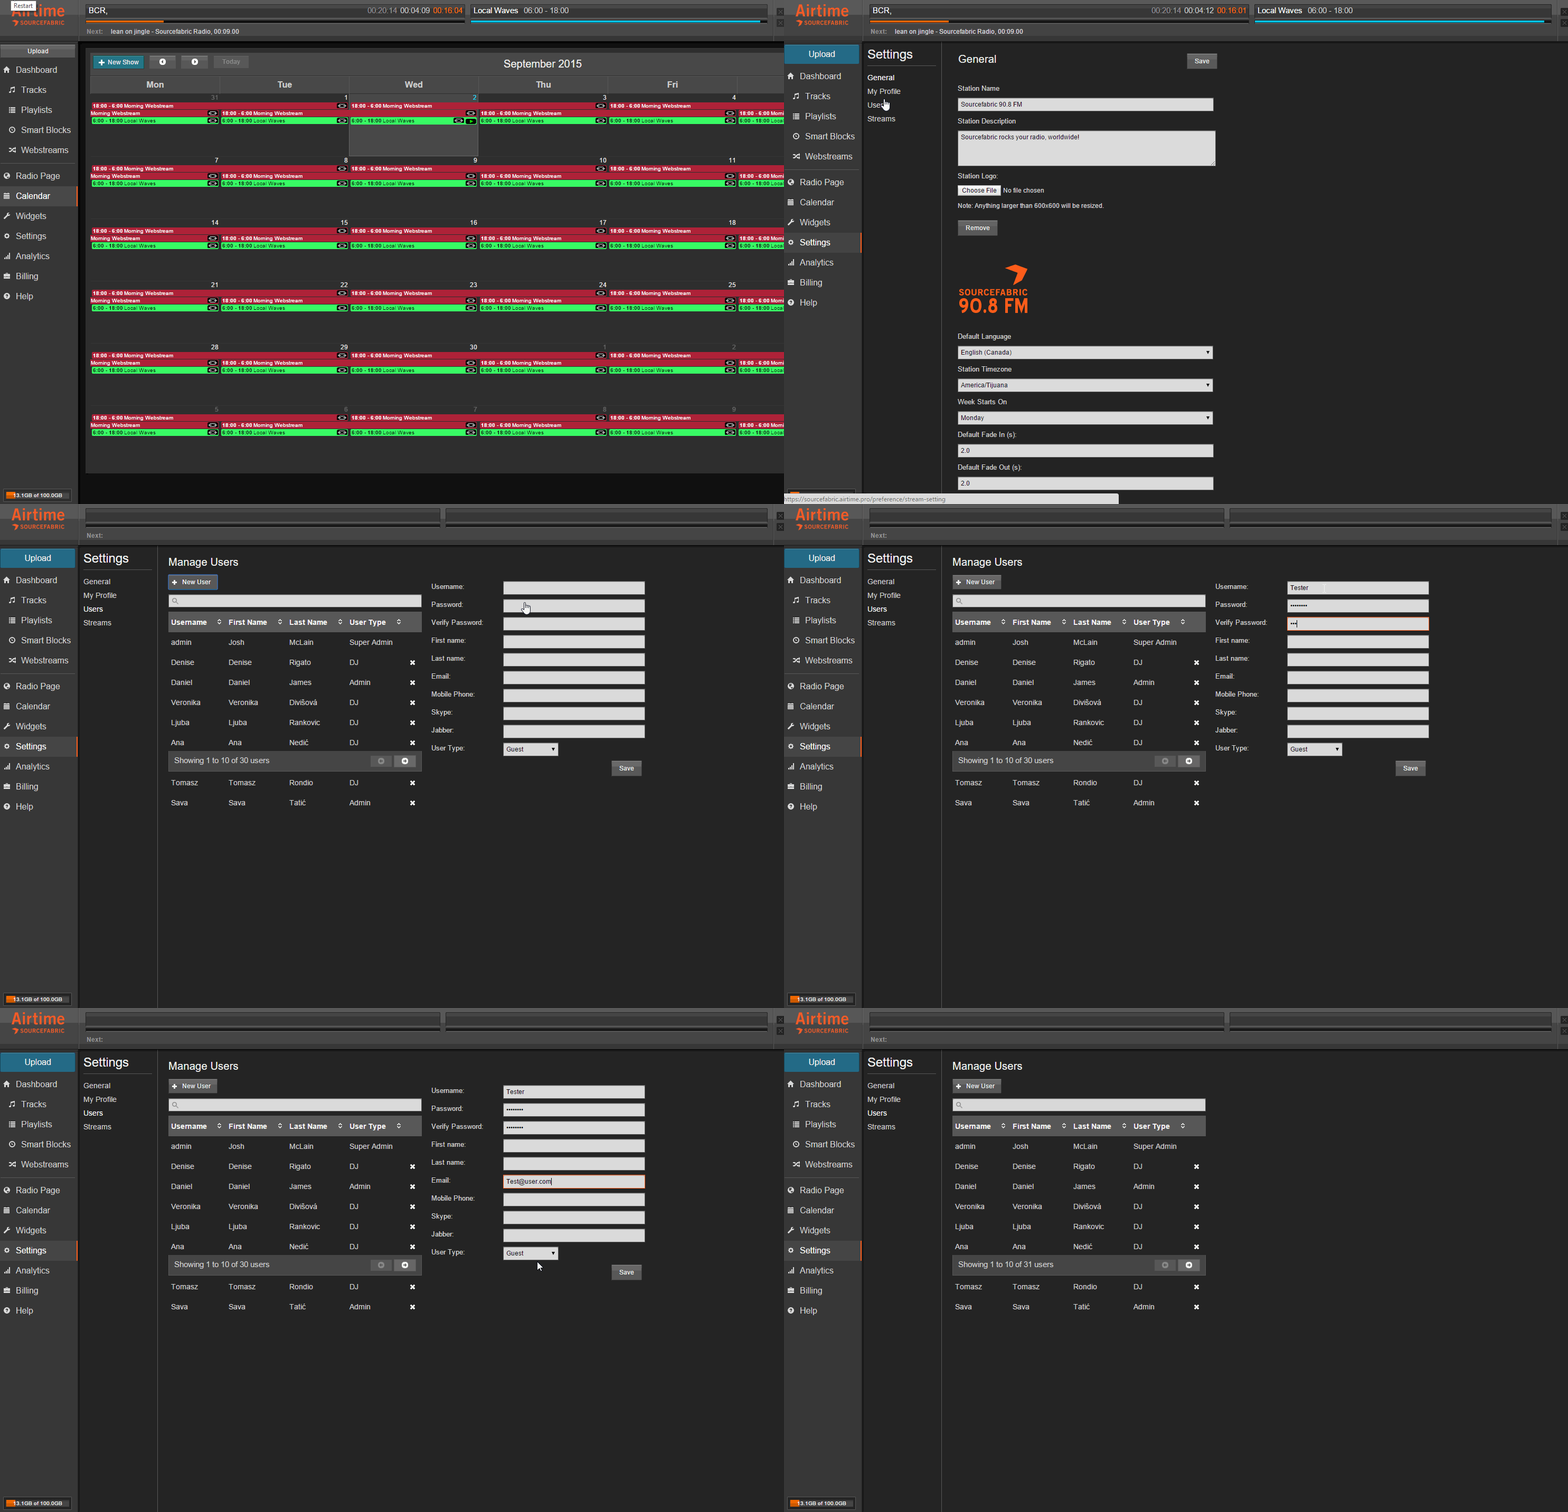
Click Settings and select Users from the menu to open the Manage Users screen. Click “+ New User” and fill in Username, Password and email, on the right hand side. Set the User Type to DJ and then click Save. This user will now be able to upload music and schedule tracks/playlists to shows you’ve assigned them to. For more information on adding users and their permissions, refer to this part of the manual.
8. Share your station’s stream URL!
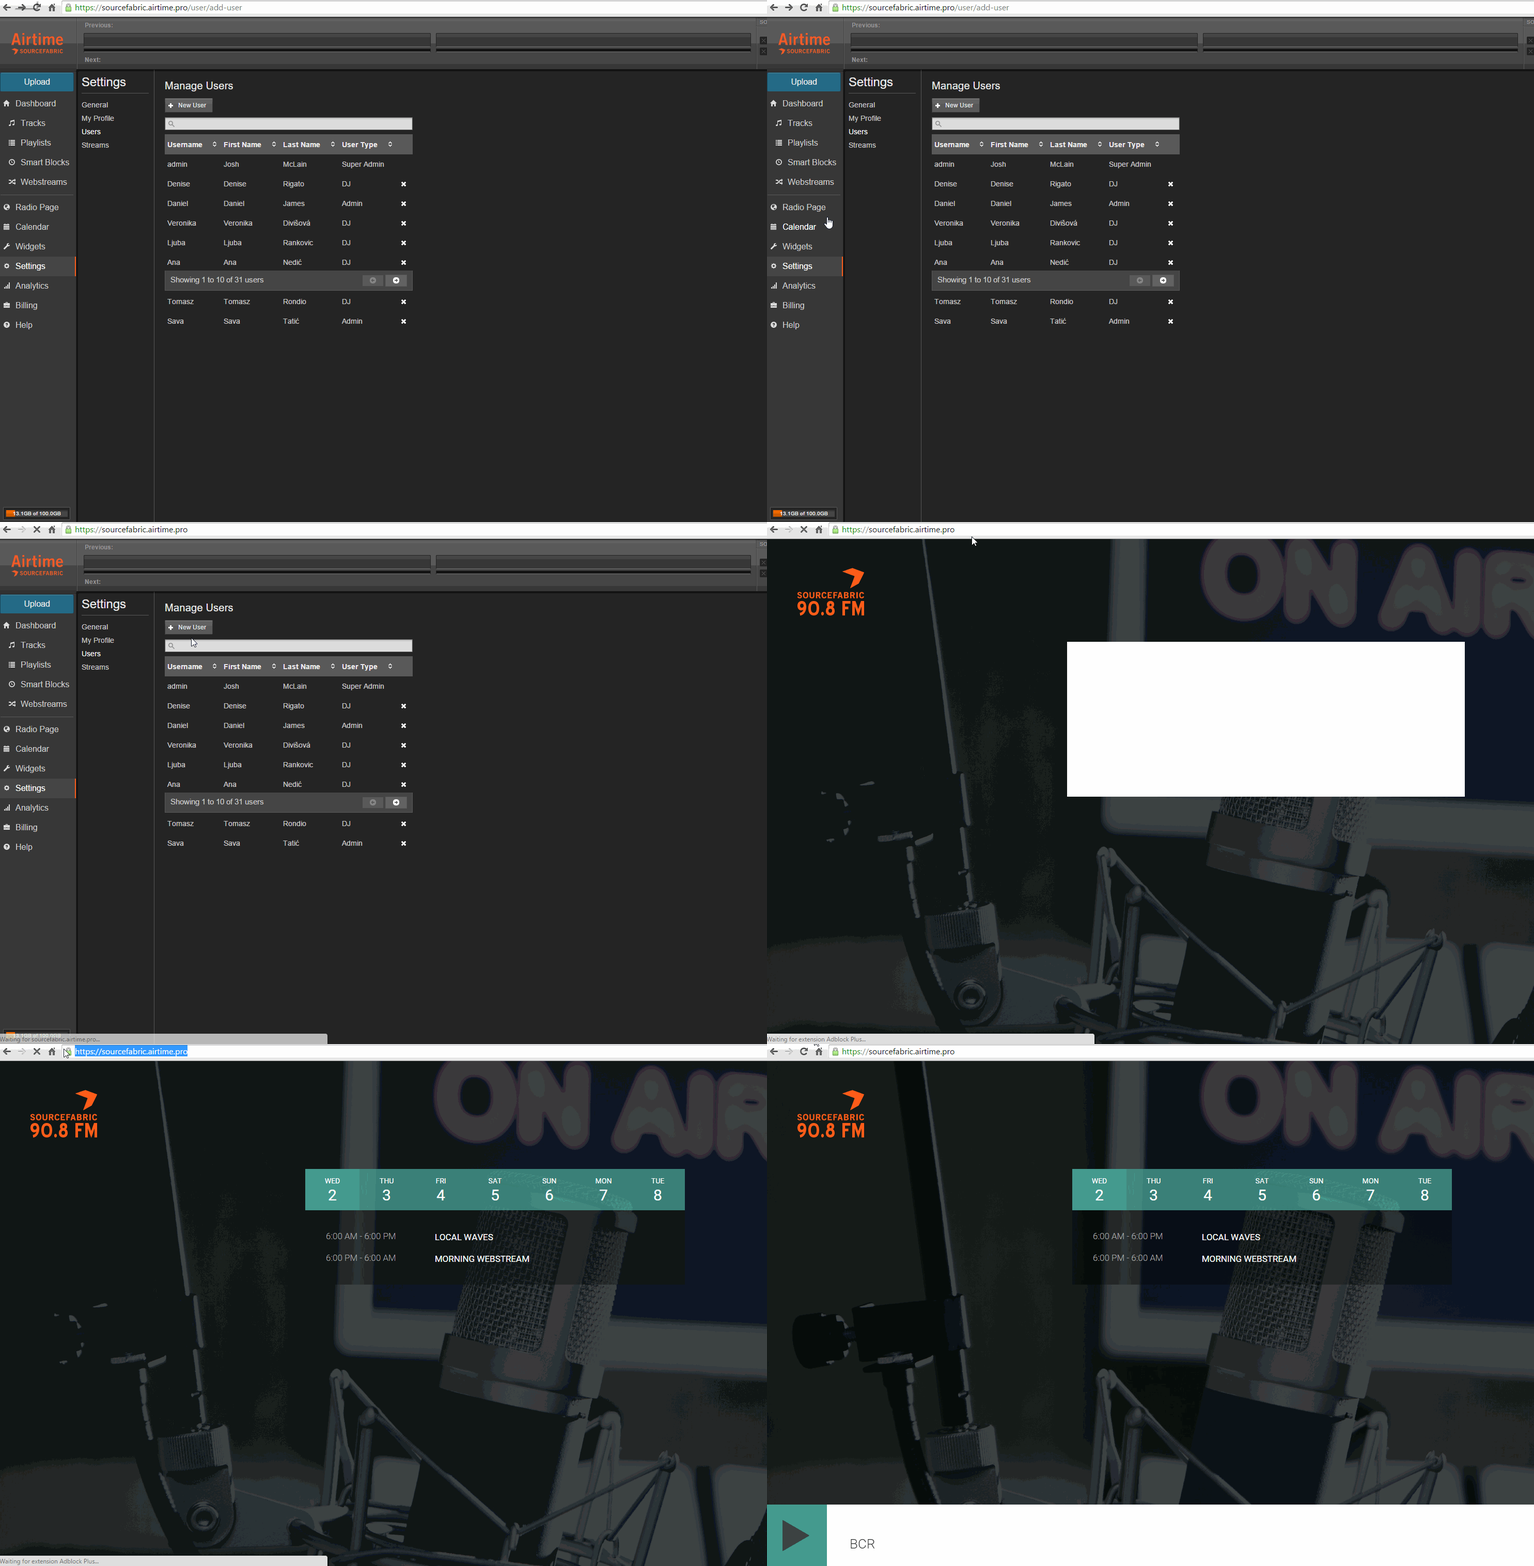
To preview what your radio page will look like for your listeners, click the Radio Page link on the left. Once there you can copy the URL from your browsers navigation bar and share it with your listeners however you like.
Recent Posts
- 6 Podcast Topic Ideas for Your Internet Radio Station
- 8 Essential Tips for Branding Your Internet Radio Station
- Why You Should Start a Podcast in 2026: Key Benefits and Practical Tips
- Tips on How to Promote and Programme Your College Radio Station
- Broadcasting & Internet Radio: Trends, Challenges & Opportunities for the Next Five Years

Leave a Reply